Yep it Tuesday again and we manage another scenario.. As below…
The Armies:
Players choose armies to an agreed point’s total, with 3000 points per side recommended for play.
The Battlefield:
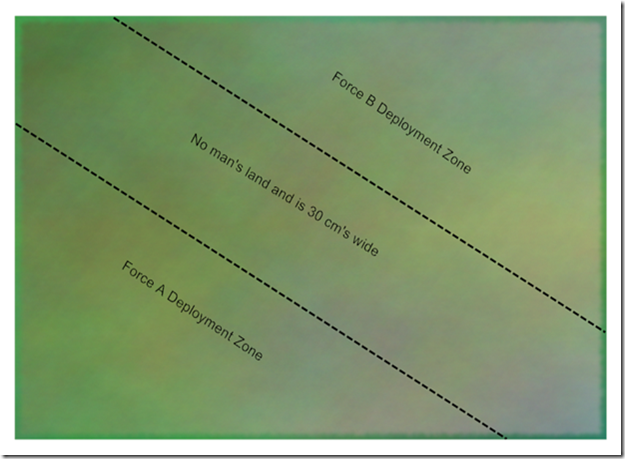
This battle is played on a 6 ft x 4 ft table divided into three sections as shown in the diagram below. Set up the terrain on the battlefield in a mutually agreed manner. Once the terrain is done, The highest strategy rating player will place D3+2 VP markers in No Mans Land on the board. No VP marker can be closer than 30 cm’s to another VP marker.
Deployment:
The army with the highest strategy rating deploys first and is call Force A and deploys its entire force in area marked on the map. Then Force B will deploy all his forces in the area marked on the map…
First Turn:
Roll a D6 and add strategy rating to see who goes first.
Game Length:
This mission lasts for Four turns.
Victory Conditions
At the end of the game each side gains 2 Victory points for each VP objective they hold. Also break their spirt counts for this scenario.
MISSION SPECIAL RULES
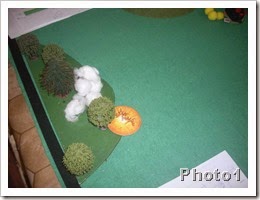
Raging Inferno: At the start of each turn, the player whose turn it is, places a Firestorm marker on the table. A Firestorm marker is a 60mm diameter marker topped by a suitable representation of fire. The marker scatters randomly 3D6 cm once it has been placed. The marker can’t be place any closer than 20 cm’s near a formation. Any models within 15cm of the marker suffer a hit on 5+ and can make normal saves. Firestorm markers remain in play(only scatters once) and will cause hits against models within 15cm at the start of each turn.
Burning World: Furthermore, if a Firestorm marker ends up on or in a piece of terrain, then that terrain burst into flames and becomes Dangerous terrain, if it were not also already. In addition for the purposes of the Firestorm marker, the terrain piece now blocks line of sight entirely for any mode! Shooting through it (targets within May still be targeted normally)
ARIMES USED
Splinter Fleet Rusalka: Biotitan List V1.0
Assault Biotitan cluster 600
Hierophants
weapons loadout
2 x Heavy Biocannon +50
Upgrade
Reinforced carapace +25
hive node cluster 1075
hierarch
weapons loadout
2x Titan biocannon
2x razor claws
Spore colony
Adreanl glands
Support Biotitan cluster 500
hierophages
support formations
siegebreaker swarm 275
Trygon prime
3 Devourer carnifex
siegebreaker swarm 275
Trygon prime
3 Devourer carnifex
siegebreaker swarm 275
Trygon prime
Gargant Bigmob (3.1 - Developmental)
GREAT GARGANT [910]
(Kustom) Power Fields, (Kustom) Extra Armour Bitz, Flak Wagonz, Mekboy Big Boss, Grot Guided Missile, Mega Choppa, Ripper Fist
GARGANT [700]
(Kustom) Power Fields, (Kustom) Extra Armour Bitz, Grot Guided Missile, Mega Choppa, Ripper Fist
GARGANT [700]
(Kustom) Power Fields, (Kustom) Extra Armour Bitz, Grot Guided Missile, Mega Choppa, Ripper Fist
GARGANT [700]
(Kustom) Extra Armour Bitz, (Kustom) Power Fields, Grot Guided Missile, Mega Choppa, Ripper Fist
**********************************************************************************************************************
DEPLOYMENT
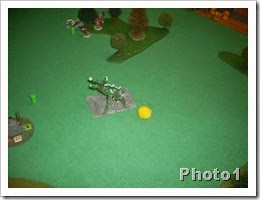
- Gargant Bigmob deployment(Photo1)
- Splinter Fleet Rusalka: Biotitan List V1.0 deployment(Photo1)
**********************************************************************************************************************
TURN1
- Gargant Bigmob go first…
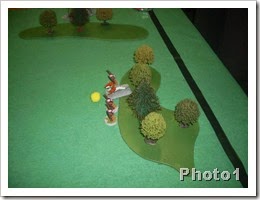
- Gargant Bigmob place the first Firestorm marker, near the chipmunk. In the hopes to have chard chipmunk for lunch..was not to be(Photo1)
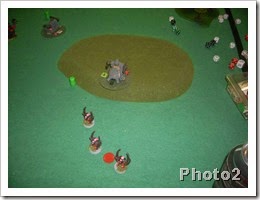
- Gargant Bigmob sustain fire GARGANT(used SCR)(no BM)(Photo1) and shoots hierarch, doing 4 DC and Giving it 5 BM’s(Photo2)
- Splinter Fleet Rusalka fail to activate the hierarch, and so it move into the woods little more(Photo1)
- Gargant Bigmob sustain fire GARGANT(Photo1) and shoots hierarch, doing 4 DC and killing it out right(Photo2)
- Splinter Fleet Rusalka double move Hierophants(Photo1) and shoots Great Gargant, giving it a BM(Photo2)
- Gargant Bigmob do engage action with Great GARGANT(Support from 2 Gargant)and target the Hierophants(Photo1).The dice are rolled and the Hierophants(Suffered 11DC) wins combat and the Great GARGANT(Suffered 10DC) is broken and so is the Hierophants, due to BM’s. Both stay were they are(Photo2).
- Splinter Fleet Rusalka March move siegebreaker swarm(Photo1)
- Gargant Bigmob do engage action with GARGANT and target the Hierophants(Photo1).The dice are rolled and the GARGANT wins combat and the Hierophants is killed out right and the Gargant dies from lots of fires(pop it here instaead at the end of the phase)(Photo2).
- Splinter Fleet Rusalka fail to activate the siegebreaker swarm, and so moves(Photo1)
- Splinter Fleet Rusalka fail to activate the siegebreaker swarm, and so moves(Photo1)
- Both sides remove Blast Markers.
**********************************************************************************************************************
TURN2
- Gargant Bigmob go first…
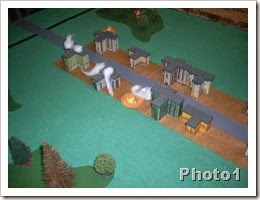
- Gargant Bigmob place the first Firestorm marker, in the centre of the city. (Photo1)
- Gargant Bigmob double move GARGANT(Photo1) and shoots siegebreaker swarm,killing 1 and giving it a BM(Photo2)
- Splinter Fleet Rusalka sustain fire hierophages,(Photo1) and shoots Great Gargant, Taking 2 power fields down and killing 1 and gives the it 2 BM’s(Photo2)
- Splinter Fleet Rusalka do a engage action with the siegebreaker swarm and target the Great Gargant(Photo1).The dice are rolled and the Great Gargant wins the combat and the siegebreaker swarm is Wiped from the board.The Great Gargant stays were it is(Photo2).
- Gargant Bigmob sustain fire Great GARGANT(Photo1) and shoots hierophages, doing 2 DC and Giving it 3 BM’s(Photo2)
- Splinter Fleet Rusalka fail to activate the siegebreaker swarm, and so moves(Photo1)
- Gargant Bigmob double move GARGANT(Photo1) and shoots siegebreaker swarm, giving it a BM(Photo2)
- Splinter Fleet Rusalka move siegebreaker swarm(Photo1)
- Both sides remove Blast Markers.
**********************************************************************************************************************
TURN3
- Gargant Bigmob won roll,
- Gargant Bigmob place the Third Firestorm marker, behind the some bugs, but the forest ended up, begin the main receiver of the Firestorm
- Gargant Bigmob do engage action with GARGANT and target the siegebreaker swarm(Photo1).The dice are rolled and the GARGANT wins combat and the siegebreaker swarm stays were it is(Broken) and the Gargant stays were it is(Photo2).
- Splinter Fleet Rusalka march move hierophages(Photo1)
- Gargant Bigmob do engage action with Great GARGANT(Support from Gargant)and target the hierophages(Photo1).The dice are rolled and the Great GARGANT wins combat and the hierophages is wiped from the board(Photo2).
- Gargant Bigmob double move GARGANT(Photo1) and shoots siegebreaker swarm, giving it a BM(Photo2)
- Splinter Fleet Rusalka do a engage action with the siegebreaker swarm and target the Gargant(Photo1).The dice are rolled and the Gargant wins the combat and the siegebreaker swarm is broken(Photo2).The siegebreaker swarm flees back into the woods and the gargant, gets 2 BM’s due to hits suffered(Photo3)
- Splinter Fleet Rusalka fail to rally siegebreaker swarm. Both sides remove Blast Markers.
- Great Gargant finely succumb to the firs on board….(Photo1)
- Splinter Fleet Rusalka fail to rally siegebreaker swarm. Both sides remove Blast Markers.
**********************************************************************************************************************
TURN4
- Gargant Bigmob go first…
- Gargant Bigmob place the fourth Firestorm marker, near the chipmunk. In the hopes to have chard chipmunk for lunch again..was not to be again(Photo1)
- Gargant Bigmob do engage action with GARGANT and target the broken siegebreaker swarm(Photo1).The dice are rolled and the GARGANT wins combat and the broken siegebreaker swarm stays were it is and the Gargant consolidates back 5 cms(Photo2).
- Splinter Fleet Rusalka fail to activate the siegebreaker swarm, and so regroup(Photo1)
- Gargant Bigmob do engage action with GARGANT and target the siegebreaker swarm(Photo1).The dice are rolled and the GARGANT wins combat and the broken siegebreaker swarm stays were it is and the Gargant stays were it is(Photo2).
- Splinter Fleet Rusalka fail to rally siegebreaker swarm. Both sides remove Blast Markers.
- Game called Gargant Bigmob win 6-0
**********************************************************************************************************************
Summary
Interesting game.. really through the Tyranids had lost it by turn 2, but we played on. Everyone was happy with layout and the deployment. The main discuss was about the Firestorm markers and increasing their size to match the Large Template used for the Spaceships BP’s and also other delivery methods for it. That may make it tougher for large infantry formations, but we plan on another game next week.. so may try the larger templates.
Regards
Greg








No comments:
Post a Comment