Well it Tuesday and so we did another scenario…Well we did the same one as last week, I tweaked a few things
The Death Of Incentives’
Armies
Both sides choose armies to an agreed point’s total. This game is recommended for armies of between 2,000 and 3,000 points, with Force B will have 500 more points available to them in all cases than the Force A (so, for example, if the Force A have 2,000 points to spend, then the Force B would have 2,500 points and so on). No planetfall or teleporting allowed.
The Battlefield
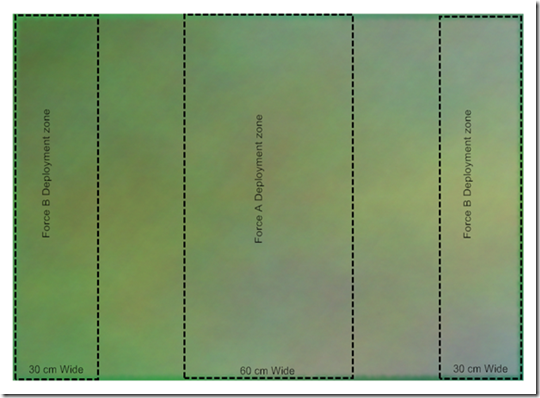
This battle is played on a 6 ft x 4 ft table divided into three sections as shown in the diagram below. Set up the terrain on the battlefield in a mutually agreed manner, with at least three sizable (minimum 15cm across) pieces of terrain placed in each table section. At least three piece of terrain must be water type…The Force A side may choose a single piece of terrain within the middle table section to represent Force A rallying point.
Deployment
Before deployment both sides roll a dice and the highest score, can choose to be Force A or Force B .The Force A player deploys their entire army within the table's central section. No Force A formations may be held off board even if they would normally be able to do so. If force A has aircraft then they must be part of the 500 points that is dropped. The Force B splits his force into to equal forces points wise. Than deploys one of each of these forces in Force B deployment zones.
First Turn
The Force B automatically has the first tum. Then from 2 turn on, roll to see who goes first…
Battlefield Terrain:
Mysterious Rivers, lakes and pools rules are to be used in this scenario.
Game Length
This mission has a game length of at least six turns. At the end of the sixth rum, roll a D6. On the result of a 4+, a seventh and final turn is played.
Victory Conditions
At the end of the game the player with the most Victory points has won the game. If both players have the same number of Victory point’s the game is a draw.
Main Objectives
Absolute Annihilation (Force B): At the end of the game each player receives 1 victory point for each enemy unit that has been completely destroyed. Formations that are broken at the end of the game, or formations that are not on the board at the end of the game, count as having been destroyed (bombers/Fighter Bombers/Fighter don’t count). War engines are worth 2 victory points if destroyed and if a Supreme commander is slain this is worth 3 victory points.
We Still Bear (Force A): For every Force A formation still surviving at the end of the battle, the Force A player gains 2 Victory points.
Armies used
Hive Fleet Onachus Tyranids (NetEA v10.2.1 *APPROVED*)(Force B)
TYRANID SWARM (S) [515]
8 Termagants, Hive Tyrant, Tyranid Warriors, 5 Raveners, 2 Zoanthrope (745.M41)
HIERODULE BIO-TITAN (745.M41) [350]
TYRANID SWARM (S) [500]
Hive Tyrant, 6 Hormagants, 4 Carnifex, Tyranid Warriors, 2 Zoanthrope (745.M41)
HIERODULE BIO-TITAN (745.M41) [350]
TYRANID SWARM (S) [490]
Two Tyranid Warriors, 8 Termagants, 2 Zoanthrope (745.M41), 4 Haruspex
EXOCRINE SWARM (M) [325]
6 Exocrine
TYRANID SWARM (S) [460]
Two Tyranid Warriors, 8 Termagants, Tyranid Warriors, 2 Zoanthrope (745.M41), 2 Raveners, Carnifex
Ghazgkhull Thraka's War Horde (NetEA Tournament Pack 2013)(Force A)
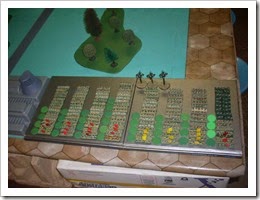
(numbers in the picture line up with warband)
WARBAND (BIG) [400](1)
4 Nobz, 12 Boyz, 4 Grotz, 2 Boyz + Grotz
WARBAND (BIG) [350] (2)
4 Nobz, 12 Boyz, 4 Grotz
WARBAND (BIG) [350] (3)
4 Nobz, 12 Boyz, 4 Grotz
WARBAND (BIG) [350] (4)
4 Nobz, 12 Boyz, 4 Grotz, Warlord
WARBAND (BIG) [350] (5)
4 Nobz, 12 Boyz, 4 Grotz
WARBAND (BIG) [350] ( 6 )
4 Nobz, 12 Boyz, 4 Grotz
WARBAND (BIG) [350](7)
4 Nobz, 12 Boyz, 4 GrotzWARBAND (BIG) [350]
4 Nobz, 12 Boyz, 4 Grotz
FIGHTA SKWADRON [150]
3 Fighta Bomba
**********************************************************************************************************************
Deployment
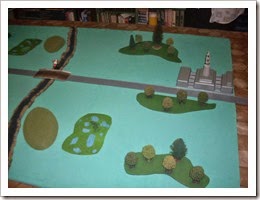
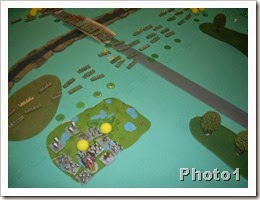
Table layout
- Ghazgkhull Thraka's War Horde
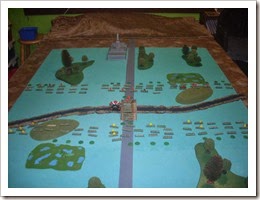
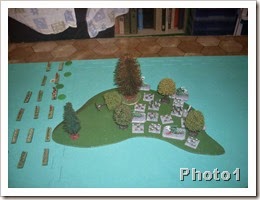
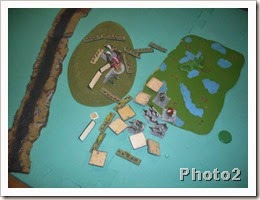
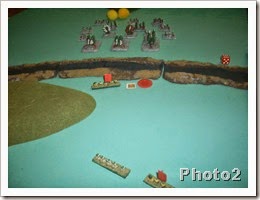
- Hive Fleet Onachus Tyranids deployment..Photo1 shows right deployment and photo2 shows left side deployment
**********************************************************************************************************************
Turn1
- Hive Fleet Onachus Tyranids goes first……
- Hive Fleet Onachus do sustain fire with EXOCRINE SWARM(M)(Photo1) and so shoots the WARBAND (BIG),Killing 1 and giving it 2 BM’s(Photo2)
- Ghazgkhull Thraka's places WARBAND (BIG), on overwatch(Photo1)
- Hive Fleet Onachus activate HIERODULE BIO-TITAN (745.M41)(BM from OWF)(Photo1) and so shoots the WARBAND (BIG), killing 3 and giving it 4 BM’s(Photo2)
- Hive Fleet Onachus activate HIERODULE BIO-TITAN (745.M41)(Photo1) and so shoots the WARBAND (BIG), killing 4 and giving it 5 BM’s(Photo2)
- Ghazgkhull Thraka's places WARBAND (BIG), on overwatch(Photo1)..
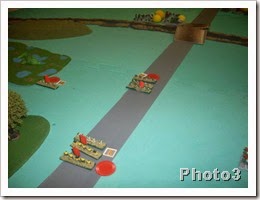
- Hive Fleet Onachus does a engage action with TYRANID SWARM (S) and targets WARBAND (BIG) (Photo1).The dice are rolled and the TYRANID SWARM (S) is the winner and the WARBAND (BIG) is broken and flees behind hill(Photo3).
- Ghazgkhull Thraka's places WARBAND (BIG), on overwatch(Photo1)
- Hive Fleet Onachus does a double move with TYRANID SWARM (S)Photo1)
- Ghazgkhull Thraka's does a engage action with WARBAND (BIG), and targets TYRANID SWARM (S)(Photo1).The dice are rolled and the WARBAND (BIG), wins the combat and the TYRANID SWARM (S) is broken(Photo2).The TYRANID SWARM (S) flees into the woods(Photo3).The WARBAND (BIG), consolidates(Photo4).
- Hive Fleet Onachus does a march move with TYRANID SWARM (S)(Photo1)
- Ghazgkhull Thraka's places WARBAND (BIG), on overwatch(Photo1)
- Hive Fleet Onachus does a march move with TYRANID SWARM (S)(BM’S from OWF)(Photo1)
- Hive Fleet Onachus don’t remove BM from TYRANID SWARM (S).
**********************************************************************************************************************
Turn2
- Hive Fleet Onachus Tyranids goes first……
- Hive Fleet Onachus does a engage action with TYRANID SWARM (S) and targets WARBAND (BIG) (Photo1).The dice are rolled and first round is a tie(Photo2).The dice are rolled again and this time the WARBAND (BIG) is the winner and the TYRANID SWARM (S) is broken and flees to the woods(Photo3).The WARBAND (BIG) consolidates(Photo4)
- Ghazgkhull Thraka's does a engage action with WARBAND (BIG), and targets TYRANID SWARM (S)(Photo1).The dice are rolled and the TYRANID SWARM (S),wins the combat and the WARBAND (BIG), is broken(Photo2).The WARBAND (BIG), flees back towards the stream(Photo3) and the TYRANID SWARM (S) consolidates(Photo4)
- Hive Fleet Onachus does a engage action with TYRANID SWARM (S) and targets WARBAND (BIG) (Photo1).The dice are rolled and first round is a tie(Photo2).The dice are rolled again and this time the TYRANID SWARM (S) is the winner and the WARBAND(BIG) is wiped from the board(Photo3).The TYRANID SWARM (S) consolidates(Photo4)
- Ghazgkhull Thraka's does a engage action with WARBAND (BIG), and targets TYRANID SWARM (S)(Photo1).The dice are rolled and the WARBAND (BIG), wins the combat and the TYRANID SWARM (S) is broken(Photo2).The TYRANID SWARM (S) flees to the woods(Photo3)
- Hive Fleet Onachus activate HIERODULE BIO-TITAN (745.M41)(Photo1) and so shoots the WARBAND (BIG), killing 7 and giving it 7 BM’s(Photo2)
- Ghazgkhull Thraka's does a marshalling action on WARBAND (BIG), so moves and removes all BM’s(Photo1)
- Hive Fleet Onachus does a marshalling action with TYRANID SWARM(S)(BM from OWF)(Photo1), so moves and then remove all BM’s and adds some low life bugs(Photo2)
- Ghazgkhull Thraka's keeps WARBAND (BIG) on overwatch(Photo1)
- Hive Fleet Onachus fail to activate EXOCRINE SWARM(M) and so regroup(Photo1)
- Hive Fleet Onachus activate HIERODULE BIO-TITAN (745.M41)(Photo1) and so shoots the WARBAND (BIG), killing 4 and giving the formation 5 BM’s(Photo2)
- Hive Fleet Onachus double move TYRANID SWARM (S)(Photo1) and shoots broken WARBAND (BIG), killing 3(Photo2)
- Ghazgkhull Thraka's don't rally WARBAND (BIG)(2), both sides remove BM’s
**********************************************************************************************************************
Turn3
- Ghazgkhull Thraka's War Horde…….
- Ghazgkhull Thraka's does a double move with WARBAND (BIG)(Photo1) and shoots TYRANID SWARM (S), giving it a BM(Photo 2)
- Ghazgkhull Thraka's does a double move with WARBAND (BIG)(Photo1) and shoots TYRANID SWARM (S), giving it a BM(Photo 2)
- Hive Fleet Onachus doe s a engage action with TYRANID SWARM (S) and targets WARBAND (BIG) (Photo1).The dice are rolled and first round is a tie(Photo2).The dice are rolled again and this time the TYRANID SWARM (S) is the winner and the WARBAND(BIG) is wiped from the board(Photo3).The TYRANID SWARM (S) gets a BM and consolidates on the hill(Photo4)
- Ghazgkhull Thraka's does a double move with WARBAND (BIG)(Photo1)
- Hive Fleet Onachus move with EXOCRINE SWARM(M)(BM from OWF)(Photo1) and so shoots the WARBAND (BIG),giving it a BM(Photo2)
- Hive Fleet Onachus double move TYRANID SWARM (S)(Photo1) and shoots broken WARBAND (BIG), killing 1(Photo2)
- Hive Fleet Onachus does a marshalling action with TYRANID SWARM (S)(Photo1) and shoots WARBAND (BIG), giving it a BM(Photo2) and then removes all BM’s and adds some low life bugs(Photo3)
- Hive Fleet Onachus does a marshalling action with TYRANID SWARM (S)(Photo1), so moves and then remove all BM’s and adds some low life bugs(Photo2)
- Hive Fleet Onachus activate HIERODULE BIO-TITAN (745.M41)(Photo1) and so shoots the WARBAND (BIG), killing 9 and breaking the formation and so it flees down behind woods(Photo2)
- Hive Fleet Onachus don’t remove BM from EXOCRINE SWARM (M)
**********************************************************************************************************************
Turn4
- Hive Fleet Onachus Tyranids goes first……
- Hive Fleet Onachus doe s a engage action with TYRANID SWARM (S) and targets WARBAND (BIG) (Photo1).The dice are rolled and the TYRANID SWARM (S) win and the WARBAND (BIG) is wiped from the board(Photo2).TYRANID SWARM (S) consolidates back to the woods(Photo3)
- Hive Fleet Onachus fail to activate HIERODULE BIO-TITAN (745.M41)(Photo1) and so shoots the WARBAND (BIG), killing 1 and giving it 2 BM’s(Photo2)
- Ghazgkhull Thraka's fail to activate WARBAND (BIG) and so it breaks due to BM’s and flees back over the stream, down pass the swamp(Photo1)
- Hive Fleet Onachus fail to activate HIERODULE BIO-TITAN (745.M41)(Photo1) and so shoots the WARBAND (BIG), killing 1 and giving it 2 BM’s(Photo2)
- Ghazgkhull Thraka's fail to activate WARBAND (BIG) and so regroup(Photo1)
- Hive Fleet Onachus doe s a engage action with TYRANID SWARM (S) and targets WARBAND (BIG) (Photo1).The dice are rolled and the TYRANID SWARM (S) win and the WARBAND (BIG) is broken(Photo2).WARBAND (BIG) flees down the road(Photo3)
- Ghazgkhull Thraka's does a engage action with WARBAND (BIG), and targets TYRANID SWARM (S)(Photo1).The dice are rolled and the WARBAND (BIG), wins the combat and the TYRANID SWARM (S) is broken(Photo2).The WARBAND (BIG), consolidates into the woods and gets 4BM’s(Photo3).The TYRANID SWARM (S) flees to the woods near the road(Photo4)
- Hive Fleet Onachus fail to activate EXOCRINE SWARM (M)(Photo1) and so shoots the WARBAND (BIG), killing 1 and giving it 2 BM’s(Photo2)
- Hive Fleet Onachus doe s a engage action with TYRANID SWARM (S) and targets WARBAND (BIG) (Photo1).The dice are rolled and the TYRANID SWARM (S) win and the WARBAND (BIG) is broken(Photo2).WARBAND (BIG) flees down the road(Photo3)
- Ghazgkhull Thraka's don't rally WARBAND (BIG)(1) and Hive Fleet Onachus don’t remove BM from EXOCRINE SWARM (M)
- Game called and the Hive Fleet Onachus wins the game..since the Ghazgkhull Thraka's players agreed the game was his at the end of turn 5…
**********************************************************************************************************************
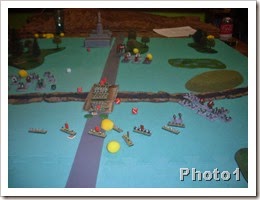
End of game shots
Summary
Interesting game..some of the tweaks may have worked. I will need to look at the 3 VP on the SC. I look forward to the next game..
Regards
Greg

























No comments:
Post a Comment