“Refight 3: The Hellblade Mts. Scenario.”
The following is an updated version of a scenario that originally appeared in the Epic 40K Battles Book, pg 76.
Situation: Glass Lizard Pass, Desolation Valley, Rynn’s World.
Force B is defending the end of Glass Lizard Pass which opens into the Alkali Plains beyond. It is defending in depth.
Force A is attempting a frontal assault with its main force while flank marching over the foothills of the Hellblade Mts. with ¼ of its strength.
Victory Conditions: The same as in a normal Tournament game except that Force B’s Blitz objective counts as two points for Force A.
Forces: We used 4000 points, but any size will do of any tournament legal army. Force B will deploy his full army. Force A will need to divide his into a ‘Main Force” made of 75% of this army and a ‘Flanking Force’ consisting of the rest. Roll 2D6 at game start. High roller= Force A. Both Force B and the Main Force of Force A will deploy normally, Force B up to 61 cm from its long side, Main Force A 20cm from its long side. Flanking Force will deploy just off table along the short edge (either, but not both. Write down which before game start to show your opponent turn 2) from Player B’s table edge to 60cm in toward his own side beginning turn 2.
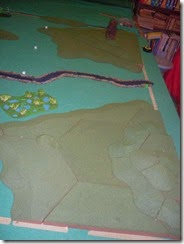
Terrain: Standard 4’ x 6’ table. On Force B’s side will be a clear mountain pass in his centre 2’ x 2’. On either side of this will be 2’x2’ of hills, dangerous or impenetrable terrain, & rough patches simulating the Hellblade Mts foothills. The rest of the table would have up to 4 pieces of small hills or occasional patch of forest, placed before sides were determined. Force B’s Blitz objective is placed in the centre back edge of the pass. All others as normal.
Game length: 5 turns.
Few words from the sub-commander of the iron claws
Tonight Greg, Trent, and I(Britt) fought our best scenario yet from the 40K Battles Book. After 4 hours of far flung combat in the Hellblade Mts, I think we were all having a bit of combat fatigue. Epic is such an intense game that you seem to totally immerse yourself in the battle until the game is over. Lots of laughs, lots of tactics, lots of pushing minis, and most of all, lots of fun.
Greg rolled high and became the Force A attacker with 3000 points of Ironclaw Space Marines, with Trent the Force B defender with a 4000 point horde of Tyranids, and I had the 1000 point Space Marine flanking force arriving turn 2.
Memorable moments for me include:
- The set up. I expected the Tyranid force to be far further forward. Instead they positively infested the mountains on both sides. Impressive numbers that were going to be hard to break.
- My force was in an uphill fight from the start as the huge Tyranid 900 something BTS with the Dominatrix was right in front of where I was to enter.
- Greg was able to clear much of the SM left flank, though Lictors teleporting in almost took out the SM artillery.
- The bugs don’t take ‘dangerous terrain tests’ it seems, and waded into the swamp to take an objective.(much to the dismay of the resident giant crocodile!).
- As expected, the flanking force got wiped out, though it did keep the Dominatrix and her brood busy eating all the Marines. YUmmmmy. Crunchy! Pass the sauce.
- While the number of Tyranids was depressing, and their spawning only made a bad situation worse, Greg kept killing them faster than they could respawn. Both Warhounds and Predators proved excellent at the task.
- Turn four, Greg had retaken our Blitz marker, contested or drove off the Tyranids from their early gains, and pushed them back on their side of the board. No way to get to their double-point Blitz marker though. There was just too many of them.
- While a surprise counterattack near the end killed a Warhound, the Tyranid army was clearly decimated. A shot by an ‘ignored’ flanking Razorback , still somehow alive, kills the last of the Dominatrix swarm for a BTS.
This was an excellent game, and the scenario is well worth replaying. While it has some aspects of the tournament game, there are enough differences to make it very challenging and well worth replaying with different sides and different armies.
Thanks for a great game guys. Next Tuesday we might try the ‘Breakout’ scenario
Army Lists
Hive Fleet Onachus Tyranids 4010 points
NEXUS SWARM [930]
1 Dominatrix, 5 Trygon, 7 Termagants, 7 Hormagants
TYRANID SWARM 1 (M) [375]
Two Tyranid Warriors, 12 Termagants, Hive Tyrant
TYRANID SWARM 2 (M) [375]
Two Tyranid Warriors, 12 Termagants, Hive Tyrant
EXOCRINE SWARM (M) [325]
6 Exocrine
LICTOR SWARM [300]
6 Lictor
TYRANID SWARM 3 (M) [375]
Two Tyranid Warriors, 12 Termagants, Hive Tyrant
TYRANID SWARM 4 (M) [380]
2 Two Tyranid Warriors, 11 Termagants, Zoanthrope (745.M41)
HARRIDAN SWARM (S) [250]
1 Harridan, 4 Gargoyles (745.M41)
BIOVORE SWARM (M) [275]
10 Biovore
GENESTEALER SWARM [200]
6 Genestealers, Brood Lord
TYRANID SWARM 5 (S) [225]
Two Tyranid Warriors, 6 Termagants, Zoanthrope (745.M41)
Codex Astartes (NetEA Tournament Pack 2013) 1000 points
SCOUT [175]
4 Scouts, Razorback
TACTICAL [350]
6 Tacticals, Chaplain, Razorback
TACTICAL [300]
6 Tacticals, Razorback PREDATOR [250]
4 Annihilator
Codex Astartes (NetEA Tournament Pack 2013) 3000 points
TACTICAL [350]
6 Tacticals, 3 Razorback, Rhinos
PREDATOR [250]
4 Annihilator
PREDATOR [250]
4 Annihilator
WHIRLWIND [300]
4 Whirlwinds
PREDATOR [250]
4 Annihilator
SCOUT [175]
4 Scouts, Razorback SCOUT [150]
4 Scouts, WARHOUND PACK [500] 2 Warhound Class Titans WARHOUND [275] Warhound Class Titans WARHOUND [275] Warhound Class Titans WARHOUND [275] Warhound Class Titans
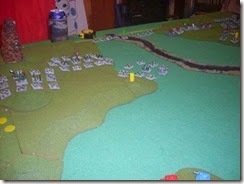
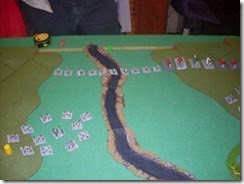
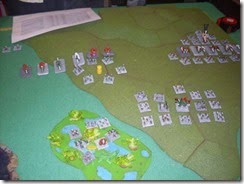
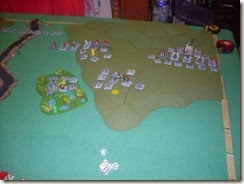
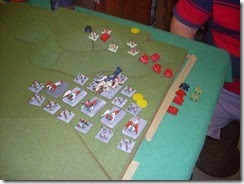
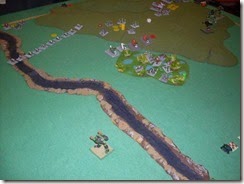
Terrain layout
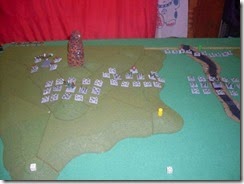
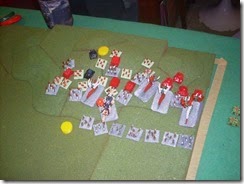
Deployment
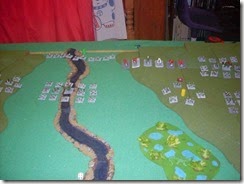
Turn 1
- SM go first….
- SM fire up the whirlwind battery and target the TYRANID SWARM 2 (M), killing 7 and adding BM’s
- HFO move up the HARRIDAN SWARM and shoot the scout unit in front of it, giving it a BM. after the scouts make some nice saves…
- SM double move a Predator unit(blue) up and target the HARRIDAN SWARM, giving it a blast marker…
- SM retain the turn and double move another Predator unit(red) up and target the HARRIDAN SWARM, giving it a wound and blast markers
- HFO then do a marshalling action with TYRANID SWARM 2 (M), so move the unit closer to a objective.. They remove the BM’s and swam back two units…
- SM double move another Predator unit(light blue) up and target the HARRIDAN SWARM, giving it a wound and blast markers..
- HFO move TYRANID SWARM 3 (M), on their right flank and target the scouts in front of them, giving the unit a blast marker…
- SM move a warhound unit up, so that its on a small hill on their right flank…
- HFO then move TYRANID SWARM 4 (M) move up to threated the flanks of the Predator unit…
- SM move a warhound unit up,and target the TYRANID SWARM 4 (M) and manage to kill a few low life bugs…
- HFO then move BIOVORE SWARM (M) up, since it cant target anything…
- SM move a warhound unit up,and target the TYRANID SWARM 4 (M) and manage to kill a few low life bugs…
- HFO then move up the EXOCRINE SWARM (M) and target the scouts, and manage to kill a few brave marines…
- SM then do a marshalling action with the scouts on their left flank and manage to remove the blast markers..
- HFO then move and target the scout unit on their left flank with TYRANID SWARM 1 (M), placing a BM on the unit…
- HFO retain the turn and move the TYRANID SWARM 5 (S) in to the swamp, and target the scout unit in front of them, giving them a BM, which is enough to break the unit, which flees back to it deployment zone…
- SM then move a tactical unit up and target the TYRANID SWARM 1 (M), giving them a BM…
- HFO leave the GENESTEALER SWARM on the objective marker they are on…..
- SM move the war hound pack up and target the TYRANID SWARM 1 (M),killing low life bugs and giving them BM…
- HFO leave the NEXUS SWARM, were its is….
- Both side rally their broken units, both sides remove blast markers….HFO swarms..
Turn 2
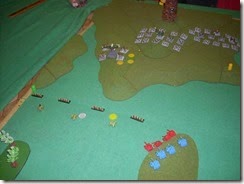
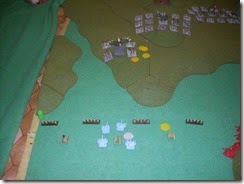
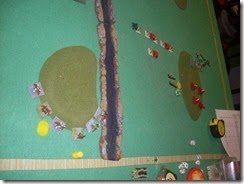
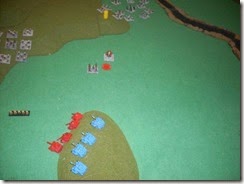
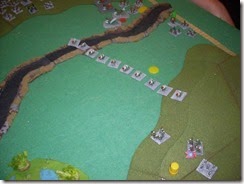
- Teleporting units (first picture) Lictors and they get one BM…
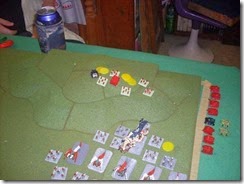
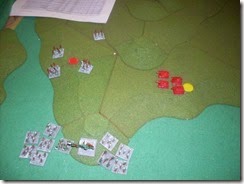
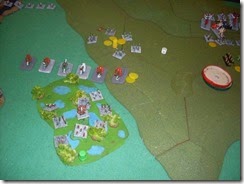
- Flanking force (second picture)
- SM go first
- SM move their whirlwind unit and then shoot the Lictors, killing one and add a BM’s
- SM retains the turn and bring on a Tactical unit from the flanking force, so it targets the NEXUS SWARM, giving the unit a BM…
- HFO then fire the BIOVORE SWARM (M), at the Tactical unit that just came onto the board..Killing two vehicles and a infantry stand…
- SM then Bring on the Predator unit from the flanking force on and target the NEXUS SWARM, causing wounds on the Dominatrix,and adding BM’s…
- SM retains the turn and brings on the other Tactical unit from the flanking force, again targeting the NEXUS SWARM… adding more BM’s to the unit…
- HFO then do a engage action with the NEXUS SWARM and manage to get the 2 tactical units and predator unit into the engagement. After the smoke clears there is only a lone razor back from the tactical unit and a lone predator. Both these units flee down the base line of the Tyranids, keeping away from the enemy…
- SM do sustain fire with a warhound unit up,and target the TYRANID SWARM 4 (M) and manage to kill a few low life bugs…
- SM retain the turn and do sustain fire with a Predator unit up,and target the TYRANID SWARM 4 (M) and manage to break the unit….
- HFO then do a engage action with TYRANID SWARM 3 (M), and target the scouts in front of them, doing a FF, and they manage to bring in the Predator unit too..The SM get support from another Predator unit… after the smoke clears the scout unit is only left a Razorback and the Predator unit is untouched, both are broken and flee back to their deployment zone…
- HFO then try and activate the HARRIDAN SWARM and fail to do so, so shoot the Predator unit(red) and give it a BM…
- SM then double move Predator unit(red) and target the HARRIDAN SWARM and manage to kill the HARRIDAN and break the unit….which flees back to it deployment zone…
- SM then retain the turn and move a warhound, so that it can shoot the Lictor swam, managing to kill three of the beast and break the unit…..
- HFO then try and activate the EXOCRINE SWARM and rolls a one, and so use the SC reroll and gets a one…and so they shot the broken Predator unit, killing the last predator..…
- SM then do sustain fire order on the tactical unit and target the TYRANID SWARM 1 (M), and kill more low life bugs and gives the unit a BM…
- HFO move TYRANID SWARM 2 (M), so that's its on the objective marker and shoot the Predator unit, giving it a BM..
- HFO retain the turn and put the TYRANID SWARM 5 (S) in to the swamp,on overwatch…
- SM the do sustain fire order with warhound at TYRANID SWARM 1 (M), killing more low life bugs and adding BM..
- HFO put the GENESTEALER SWARM on overwatch…
- SM then do sustain fire order with warhound pack at TYRANID SWARM 1 (M), killing enough units to break the swam, which flees back..
- SM then retain the turn and do a engage with the scouts in the flanking force, they do a FF with the broken TYRANID SWARM 1 (M), and they Tyranids get support from the NEXUS SWARM, after the smoke clears the scouts win the combat, wiping the TYRANID SWARM 1 (M), out and losing two stands…
- SM don't rally the Predator unit(light blue) and tactical unit from flanking force, HFO don't rally the HARRIDAN SWARM , both sides remove blast markers….HFO swarms..
Turn 3
- SM go first..
- SM move the Predator unit(red), so that its behind the TYRANID SWARM 3 (M), and claims cross fire, killing some low life bugs and adding BM’s
- SM retains the turn and do sustain fire with the Predator(blue) unit on the hill and targets TYRANID SWARM 3 (M), claiming cross fire too, so after the smoke clears the unit is broken and flees back to its deployment zone…
- HFO then does a engage action with the Lictors and targets the broken Predator(light blue) unit, in CC. The Lictors win and wipe the unit out…
- HFO retains the turn and does a sustain fire order with the EXOCRINE SWARM and targets the tactical unit in front of it, managing to kill 2 stands of infantry and a vehicle….
- SM then do sustain fire order with the scout unit (yes the lone Razorback on the left flank), and targets the Lictor swam, managing to kill one of the creatures and breaks the unit..which flees back to the Blitz marker…
- SM retains the turn and fires the whirlwind unit and targets the EXOCRINE SWARM and clips the GENESTEALER SWARM. Giving each unit two BM’s and the GENESTEALER SWARM lose a unit….
- HFO then do a engage action with the NEXUS SWARM and target the scout unit in front of it and after the smoke clears the scouts are dead….
- HFO retain the turn and move TYRANID SWARM 4 (M), back to their Blitz marker…
- SM double moves a warhound and targets the NEXUS SWARM, adding more Blast markers..
- HFO leave TYRANID SWARM 5 (S) in the swamp,on overwatch…
- HFO retain the turn and keep the GENESTEALER SWARM on overwatch…
- SM double moves a warhound and targets the NEXUS SWARM, targeting the Dominatrix, killing the beast, adding more Blast markers..
- HFO move their BIOVORE SWARM (M), up….
- SM double moves a warhound pack and targets the NEXUS SWARM, adding more Blast markers..
- HFO then put TYRANID SWARM 2 (M), on overwatch…
- SM then move a warhound and target the EXOCRINE SWARM, killing two of the beast, which is enough to break the unit… so it move back towards a objective…
- SM then do a engage action with the scout unit, and target the broken Lictor unit, in a FF. After the smoke clears the scouts win and move closer to the blitz marker…
- SM do a marshalling action with the tactical unit and shoot the TYRANID SWARM 5 (S), giving it a BM, and the unit removes all blast markers…
- Both side rally their broken units, both sides remove blast markers….HFO swarms..
Turn 4
- HFO goes first…
- HFO shoots with it’s BIOVORE SWARM (M), managing to hit two warhound units, so both got 2 BM’s and 1 lost a shield, while the other lost both…
- HFO try and retain the turn and rolls a one, so the NEXUS SWARM, moves toward the objective marker near by..
- SM then double move scout unit (yes the lone Razorback on the left flank), and take control of objective marker on the left flank….
- SM try retain the turn and fail, rolled a 1, so the lone warhound shoots the BIOVORE SWARM, killing three of the beast…
- HFO then do a engage action with TYRANID SWARM 2 (M), and does a FF with Predator unit(red), after the smoke clears, the Predator unit is broken and flees back to it deployment zone…
- SM then do a sustain fire with warhound pack and manage to kill some low life bugs and add BM’s to the NEXUS SWARM…
- HFO retain the turn and do a engage action, with the GENESTEALER SWARM and targets the warhound with no shields on their right flank..So after the smoke clears there is one less warhound and not GENESTEALER SWARM……ouch
- SM fire the whirl wind unit and target the NEXUS SWARM, killing two of the beast and this breaks the unit…which flees back towards the Blitz marker in its deployment zone.
- HFO then moves the HARRIDAN SWARM up and cover a objective marker..
- HFO then put a TYRANID SWARM 3 (M), on over watch, on their right flank…
- SM try and active lone warhound and roll a one, so which breaks the unit and it flees down the hill……
- HFO then keep the TYRANID SWARM 2 (M), on overwatch…
- SM double move a predator unit up and target the broken NEXUS SWARM, gets a BM from over watch fire…but manages to kill two of the beasts…
- SM the double move the tactical unit so that can contest two objective markers and shoots the HARRIDAN SWARM, killing two units and so the unit break, fleeing back towards the blitz marker…
- SM then do a marshalling action with the scouts on the blitz marker and manage to remove all the blast markers..
- SM then do sustain fire with the tactical unit(Yes a lone razorback),targets the broken NEXUS SWARM and claim cross fire, so after the smoke clears, the NEXUS SWARM is destroyed(BTS)…….
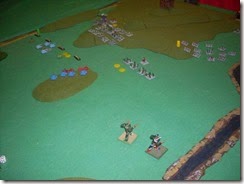
The Dead
Victory Conditions
| Victory Condition | Space Marines | Hive Fleet Onachus Tyranids |
| 1. Blitz | no | no |
| 2. Break their sprit | Yes | no |
| 3. Defend the Flag | no | no |
| 4. Take and Hold | no | no |
| 5. They Shall not Pass | no | no |
| Total | 1 | 0 |

































No comments:
Post a Comment