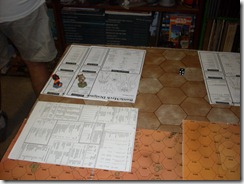
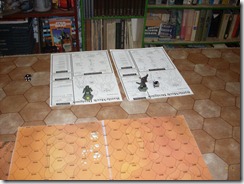
Greg & I had a very good, and very close, game of Battletech last night. We played the “Ambush” scenario where one side (the ambushee?) sets up his 4 Mechs along or beside the road leading from Valantino city in the Northwest that then cuts diagonally southeast while the ambusher set up 2 Mechs anywhere he liked in cover 7 hexes away with his remaining 2 Mechs coming on turns 2 and 3. The exact Mechs were rolled for.
Greg chose to be the “Ambushee” and the force consisting of 2 Griffins (a 1N & a 1S), a Crusader 3K and Javelin 10F. This left me to play the Ambusher with a force of a Warhammer -6L, Javelin 10F, Shadow Hawk-2K, and the Hunchback-4G(my favourite Mech).
TURN 1 THE AMBUSH: Greg set up his Mechs along the light woods/scrub near the road in the south-east. I deployed my Javelin and Warhammer 7 hexes due north in some woods. The trap was sprung! Raw firepower poured forth from the Warhammer as it blazed at its victim, a Griffin. Well, that’s what was supposed to have happened. Actually the Warhammer did nothing but give away its position, expend a lot of ammo, and drive up its heat.! The Javelin scored the only hit with a medium laser. Not a good start.
TURN 2: The Warhammer and Griffin 1 traded shots ineffectually. My Shadow Hawk enters the board from the central south, targets Griffin 2, and in a series of unfortunate events, gets a critical hit touching off the Griffins missile ammo. The explosion was spectacular.
As usual, my Javelin is doing more damage than the Warhammer. The Crusader takes revenge for its team mate and whacks the Shadow Hawk hard. Greg’s Javelin then rushes into the face of my Warhammer. A wise move as my 2 PPC’s are useless at this range.
TURN 3: I won the initiative, and elected to have my Hunchback enter the fray. In he strode, and punched 20 points of damage into the Crusader. Sadly, he was to do this 4 times during the game with no noticeable effect! Greg’s Javelin hits the Warhammer for 20 points, including a head shot. Greg got in at least 5 headshots during the game compared to none for my guys. He must do more gunnery practice! The Shadow Hawk misses with its PPC at the Crusader, but the Crusader takes out the Shadow Hawks PPC. Greg’s Javelin & Griffin shoot up my Javelin, blowing away its right arm and torso.
TURN 4: The Javelin keeps getting good hits on my Warhammer. My Shadow Hawk, with only a LRM-5 remaining, decides to put some distance between itself & the Crusader. Hunchback hits ineffectually. My Javelin explodes from precision fire from Griffin 1. The Warhammer gets 1 PPC hit on the Griffin but misses his punch attempt on the Javelin.
TURN 5: The Hunchback & Crusader exchange hits, but nothing effective. The Griffin shoots at the Warhammer and gets 2 engine critical hits. Lots of other fire. The Shadowhawk moves into the woods and forward to make a back shot on the Griffin.
TURN 6: Warhammer misses. If he hadn’t died later in the battle I’d have fired him! Griffin gets some solid hits on the Warhammer. As the Crusader is in range, the Shadow Hawk takes a chance and shoots off short range missiles. Surely the Crusader can’t take much more with the Hunchback scoring hit after hit on it! Sadly, he misses. The Crusader turns around and now scores the second engine hit on the battered Shadow Hawk.
TURN 7: The Griffin & the Javelin finally take the Warhammer down! 2 Gyro hits and it tumbles helplessly into a wood. The Hunchback scores an engine hit on the Crusader, but ignoring this, the Crusader finishes off the too brave Shadow Hawk, blowing off its head! The Hunchback decides this is as good a time to leave as any, and heads west to his extraction point. The ambush a failure.
Victory to Greg’s Patrol Lance!
May the dice roll high
Greg


No comments:
Post a Comment